OK, I give… I finally put together an article exclusively for those of you who would like to learn how to vaccinate your chicks for Mareks Disease.
Visual Steps to Vaccination


First, as indicated in my article on Mareks Disease, the sooner you vaccinate your chicks, the more effective the vaccine will be. This is because the Mareks virus is virtually everywhere, travels on the wind, and can be anywhere in your environment. It’s true that you can take precautions to reduce the risk of exposure to your chicks until you have a chance to vaccinate, but basically, the longer you wait, the higher the risk. It takes about 10 days for full immunity to develop after vaccination, so plan your program accordingly. Also order your vaccine plenty of time in advance of your hatch. When you receive your vaccine, you’ll get both a tiny vial that contains a freeze-dried vaccine and a large bottle of diluent to dilute and re-hydrate the vaccine. Refrigerate the small vial. You can keep the diluent at room temperature but out of direct heat or sunlight.
Let’s begin with a list of needed supplies.
- You’ll need the freeze-dried Mareks vaccine (and accompanying diluent for re-hydration)
- an unopened 1cc syringe with a very small needle (5/8 or 16mm)
- an unopened 3cc syringe with standard needle
- rubbing alcohol
- cotton balls
- an ‘ice bath’ (bowl containing chipped ice) if you plan on taking more than half an hour to administer after mixing
- and of course, a cheering section!
Preparing the Vaccine
After popping the tops off of both the diluent and the vial of freeze-dried vaccine (leaving the rubber stoppers in tact in both cases), apply alcohol to the rubber stoppers of each. Take the 3cc syringe and draw a full 3cc of diluent.
Insert the needle into the freeze-dried vial of vaccine and inject all 3cc of diluent. Shake the vial very gently to re-hydrate the vaccine. While using the same 3cc syringe, draw back on the plunger to draw in 3cc of air.
Insert the 3cc syringe into the vial to release the air and break the vacuum so that you can draw the vaccine out of the vial. With the needle just inside the rubber stopper and the vial upside down, draw all of the hydrated vaccine out of the vial.
Insert the needle into the bottle of diluent and inject the entire 3cc of vaccine. Gently rock the bottle of diluent back and forth to mix the solution. You now have active vaccine ready to administer to the chicks. Using your 1cc syringe (for the first time), draw out as much vaccine as you are comfortable with handling at one time. Each chick will receive 0.2cc of vaccine. (This dosage applies to all sizes of chicks.) That means that if you fill the 1cc syringe to the 1.0 mark, then you have enough to vaccinate 5 chicks before you need to redraw vaccine from the diluent bottle. Place the diluent bottle full of active vaccine into the ‘ice bath’ until you need to draw again, IF you think you will take more than half an hour to administer all of the vaccines. (The virus dies and renders the vaccine ineffective after about one hour.)
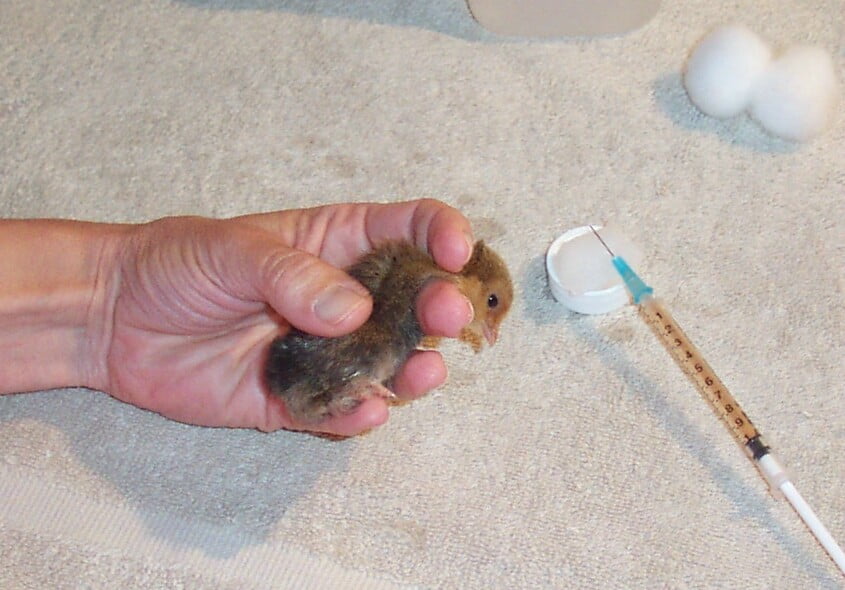
Preparing the chick
Next (and assuming that you are right-handed), take the first victim – I mean chick – in your left hand, face down and with the head facing away from you. Use your left forefinger and thumb to separate the ‘fuzz’ on the back of the neck of the chick. Don’t worry if it doesn’t work, the next step will help it along.
Use an alcohol-soaked cotton ball to clean the injection site. You will notice that the alcohol makes most of the fuzz seem to disappear, and you will see the skin clearly. You should also be able to see some tiny veins through the skin. This is good, since it will help you to avoid them when injecting the vaccine (of course this offers no help whatsoever when trying to avoid vaccinating yourself).
Making the Injection
Using the 1cc syringe with vaccine in it, insert the needle at an angle toward yourself, and just under the skin. You won’t need to insert the needle very far in order to grab just enough skin with the tip of the needle to insure that you are truly just under the skin, as opposed to into the muscle. A slight lift up on the inserted needle tip will verify further where you are. (Yes, that yellow chick lived.)
When you inject the accurate dose of 0.2cc of vaccine just under the skin, you will notice a ‘bubble’ forming where the vaccine is accumulating. This means that you are properly administering a subcutaneous (or SQ) injection of the vaccine. (I know, different chick used for the bubble picture. No, the other one did not die while I was doing this. Honest.)
Be sure to swipe your needle over an alcohol-soaked cotton ball in between injections to keep your needle sterile for your next chick.
Recovery
After vaccination, the chicks may seem, well, like they might die. They may be in a little bit of shock from the chill of the alcohol to the back of their neck. After all, they’re preferably only a day old and still accustomed to being very warm. Keep them closely monitored for 24 hours to insure that they don’t get out from under the brooder during that time or get flipped over. You should right them when you notice that happening and place them squarely under the brooder. No, it is not necessary for you to stay up all night with them, but I know many of you will be tempted. (I know who you are.)